Software Guide, Reviews & Download for Windows OS
SoftGets provides Windows Latest News, how to articles & Free Software download.
SoftGets provides Windows Latest News, how to articles & Free Software download.
SoftGets provides Windows Latest News, how to articles & Free Software download.
If you have used Windows XP for a while and now you want to upgrade your Windows then Windows 7 might be a good option for you. Even though Windows Vista was the successor of Windows XP but we all know that Windows Vista is quite lame.
Windows Vista has poor stability and performance as compared to Windows 7. You will find the interface similar to Windows XP and no whereas as good as Windows 7.
The entire OS lacks clear navigation and has no new features that will separate it from Windows XP. Whereas, unlike Windows Vista, you will find a friendly and eye-catching interface in Windows 7.
Tons of new features are brought in Windows 7. Back then, Windows 7 was really something ahead of its time. Major improvements were made to Windows.
These were the reasons why Windows 7 was the most used Windows OS. Microsoft was enforced by users to provide life extension. The original life of Windows 7 was till July 2016.
However; later on, Microsoft extended the life support of Windows 7 till 2020. It was expected by Microsoft that users will upgrade their system to Windows 10 or Windows 11. However; it looks like, users are still using Windows 7 and won’t change it for a while.
Also Read: What to do, When Windows 7 Won’t Update?
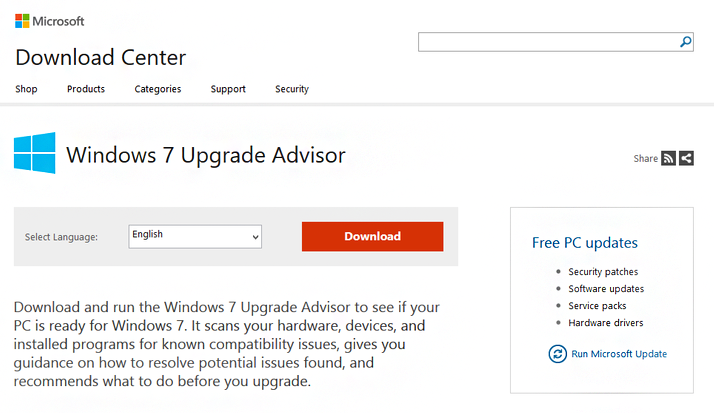
If you want to upgrade from Windows XP to Windows 7 then you are recommended to use Windows 7 Upgrade Advisor. With Windows 7 Upgrade Advisor, you will be able to check whether you can upgrade to Windows 7 or not.
It is unlikely that your system can’t run Windows 7. Almost all recent systems can run Windows 7. For making things sure here is the system requirement for Windows 7.
Once you have made sure that you can run Windows 7 on your PC then you will begin to upgrade from Windows XP.
Now that you have checked that you can run Windows 7 on your PC, you will need a setup file of Windows 7. If you have a DVD of Windows 7 then you can skip this section and continue with upgrading your Windows.
However; if you don’t possess the DVD file of Windows 7 then you are recommended to download Windows 7. There is the option for you to download Windows 7 Ultimate, Windows 7 Professional, and other editions.
Since Windows 7 has six different editions, it is quite confusing for some. Instead of downloading the incorrect editions, you can download Windows 7 AIO (all in one).
Inside the Windows 7 AIO, you will find all six editions of Windows 7. Download the setup file and during the installation, chose the edition that you think is suitable for you.
For those who are still wondering about the editions of Windows 7, here are the editions of Windows 7:
Now we will upgrade our Win XP to Win 7. Before we being the upgrading process, you are recommended to take your time and complete the prerequisites. As completing the tasks give will not only avoid any sort of data loss but will also make things easier during the upgrading process.
These are the tasks that you are compelled to perform before you begin the upgrading.
You will need to use Windows Easy Transfer. Windows Easy Transfer is a built-in feature inside Windows OS that is used to transfer your files and Settings from one Windows to another.
This feature is mostly used by users who are upgrading their systems. This way, you will avoid tons of confusion as well as any sort of data loss.
Connect any portable drive to your system and use Windows Easy Transfer to move your files. This transfer of files might take some time. The timing of moving files depends on the size of files inside your Windows.
Once the files are transferred then you will continue to the next step.
This step is for users who don’t possess any DVD of Windows 7. They will need to use third-party applications such as RUFUS to burn the ISO file of Windows 7.
Grab a USB pen drive and insert it into your PC. Now you will run RUFUS and burn the ISO.
Thanks to the easy navigation of RUFUS, you won’t need any guide to make a bootable USB. You will need to select the USB drive and the ISO file and click on Ready.
The process will being and soon you have a bootable USB of Windows 7 that will be used to upgrade Windows XP to Windows 7.
Also Read: Upgrade Windows Vista to Windows 7 Without Losing Any Data
Now we will begin the installation of Windows 7 on your PC. Since performing a clean installation is way better in terms of space on disk and to avoid any sort of issue, you are recommended to perform a clean installation of Windows 7.
This means that you will format your C drive. Formatting the C drive means, removing all the files inside too. But it will also remove any virus or malware that is present on your disk.
By performing a clean installation, you will also avoid system file errors that are experienced by users after upgrading from predecessors.
Insert your USB to your PC. If you are using a DVD then insert the DVD into DVD ROM and restart your PC.
Your system will restart and you will see “Press any key to boot…” on your screen. If your system is not booting the setup file of Windows then you are recommended to go to BIOS.
Inside the BIOS, you will change the boot sequence. Make sure you have prioritized USB and CD/DVD; save changes and exit BIOS.
Select English, including menu language, keyboard layout, and currency symbols. The options can vary if you want to use other language, keyboard layout, or currency symbols. Select the options and continue to the next step.
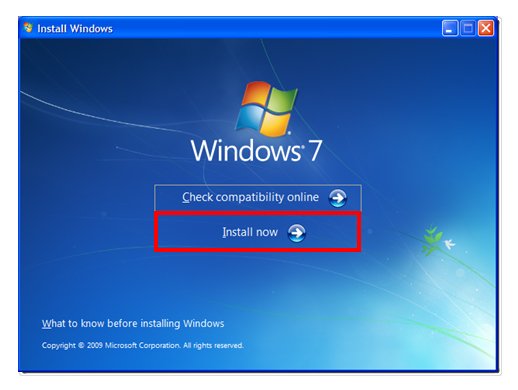
You are now placed in Windows 7 setup. Here you will click on Install now.
In the License Agreement phase, you will check the I Accept the License Terms box and click on Next.
Choose the Custom (Advanced) option and not Upgrade. We are not selecting the Upgrade option, as we are performing a clean installation of Windows.
Now you are placed in the Disk partition. Here you will select the disk where you want to install Windows 7. Normally, users select C drive for Windows installation. Select the drive, click on Drive Options (Advanced), and select Format.
Your disk will begin to format; a warning will appear here. Once the formatting of the disk got completed then you will click on Next.
Windows 7 Product Key Free Activation For 32/64-Bit
Give name and password to a local account. If you want, you can also give a hint, just in case you got the password in the future.
Choose Use Recommended Settings.
This allows Windows to visit the Internet to update itself with security patches, warn you of suspicious Web sites, check for troubleshooting information, and send technical information to Microsoft to fine-tune Windows’ performance.
Confirm your time and date settings then click on Next.
If your system is connected to internet-connected then you will be asked for your location. Select the location according to your internet connection.
Most probably, you are using an internet connection at home. So, select the Home option.
Windows will ask for downloading updates. Avoid this for now as you can download and install the updates later.
Restart your system and you have successfully installed Windows 7 on your PC. This way, you have also upgraded your Windows XP to Windows 7.